Evelyn's Quiet Book
So when I set out to make a Quiet Book for my little girl, I wish someone had just hit me over the head with one first and said, "You have no idea what you're getting yourself into!" Since I'm a beginner seamstress (as in, I've sewn 3 things in my entire life) I knew I was in a little bit too deep when I started reading words like "stabilizer" and "interfacing," but thought I could muddle my way through.
I eventually did, but not after learning my lesson. I thought it would take only a couple weeks of working and maybe $50 bucks to throw the whole thing together. Man was I in for a surprise! 4 months, an arm, and a leg later, I'm finally done.
I started with doing a tonne of research on ❤Pinterest❤ and found some ideas on pages that I thought I'd like to try. I also got inspiration from Michael's, which is where I found the sequined animals that I sewed into the book. Some of the pages I just made up myself and others I put a twist on from the ones that I'd seen.
I had to teach myself how to embroider (which is why some of the words and letters are prettier than the others - it was a bit of a learning curve!) and I'm sure the sewing techniques I used were totally wrong, but it's done, and I'm pretty sure it will at least not fall apart.
I used Peltex 71F Single Sided Fusible Stabilizer because I wanted the book to be super sturdy. I didn't want to use felt because I thought it might fall apart too easily with wear and tear, so I used flannel instead (which wasn't as great an idea as I'd thought at the time). The flannel is already starting to fray a lot, so next time (HA!) I don't think I'll use as much.
I used mostly cottons for the backgrounds of the pages, because there were much cuter patterns than with other fabrics that I found. I didn't want pieces that would get lost under chairs and such so I attached everything with ribbons.
I made the pages removable in case (heaven forbid) something happened to one of them then I would be able to take it out and hopefully fix it, and if it was beyond repair, after my emotional breakdown I would be able to make a new one. I also liked the idea of having a cover specific to Evelyn, so that we will be able to swap around books for church with the other kiddos when they are around (there will hopefully be an Alphabet - Part 2 book).
Here goes!
A is for Abacus
To do this page I first sewed the ribbons into the brown fabric post, then pinned and sewed it to the background on the left. I threaded the beads, pinned the other ends of the ribbon to the post, and sewed everything on the right of the page side down.
B is for Bee
I used a hot glue gun to stick the flowers right to the page, as well as the butterfly buttons. I used flowers from tutorials I've seen online and made them right on the page. Next time I'll measure out the lines across the hive first, instead of just eyeballing them.
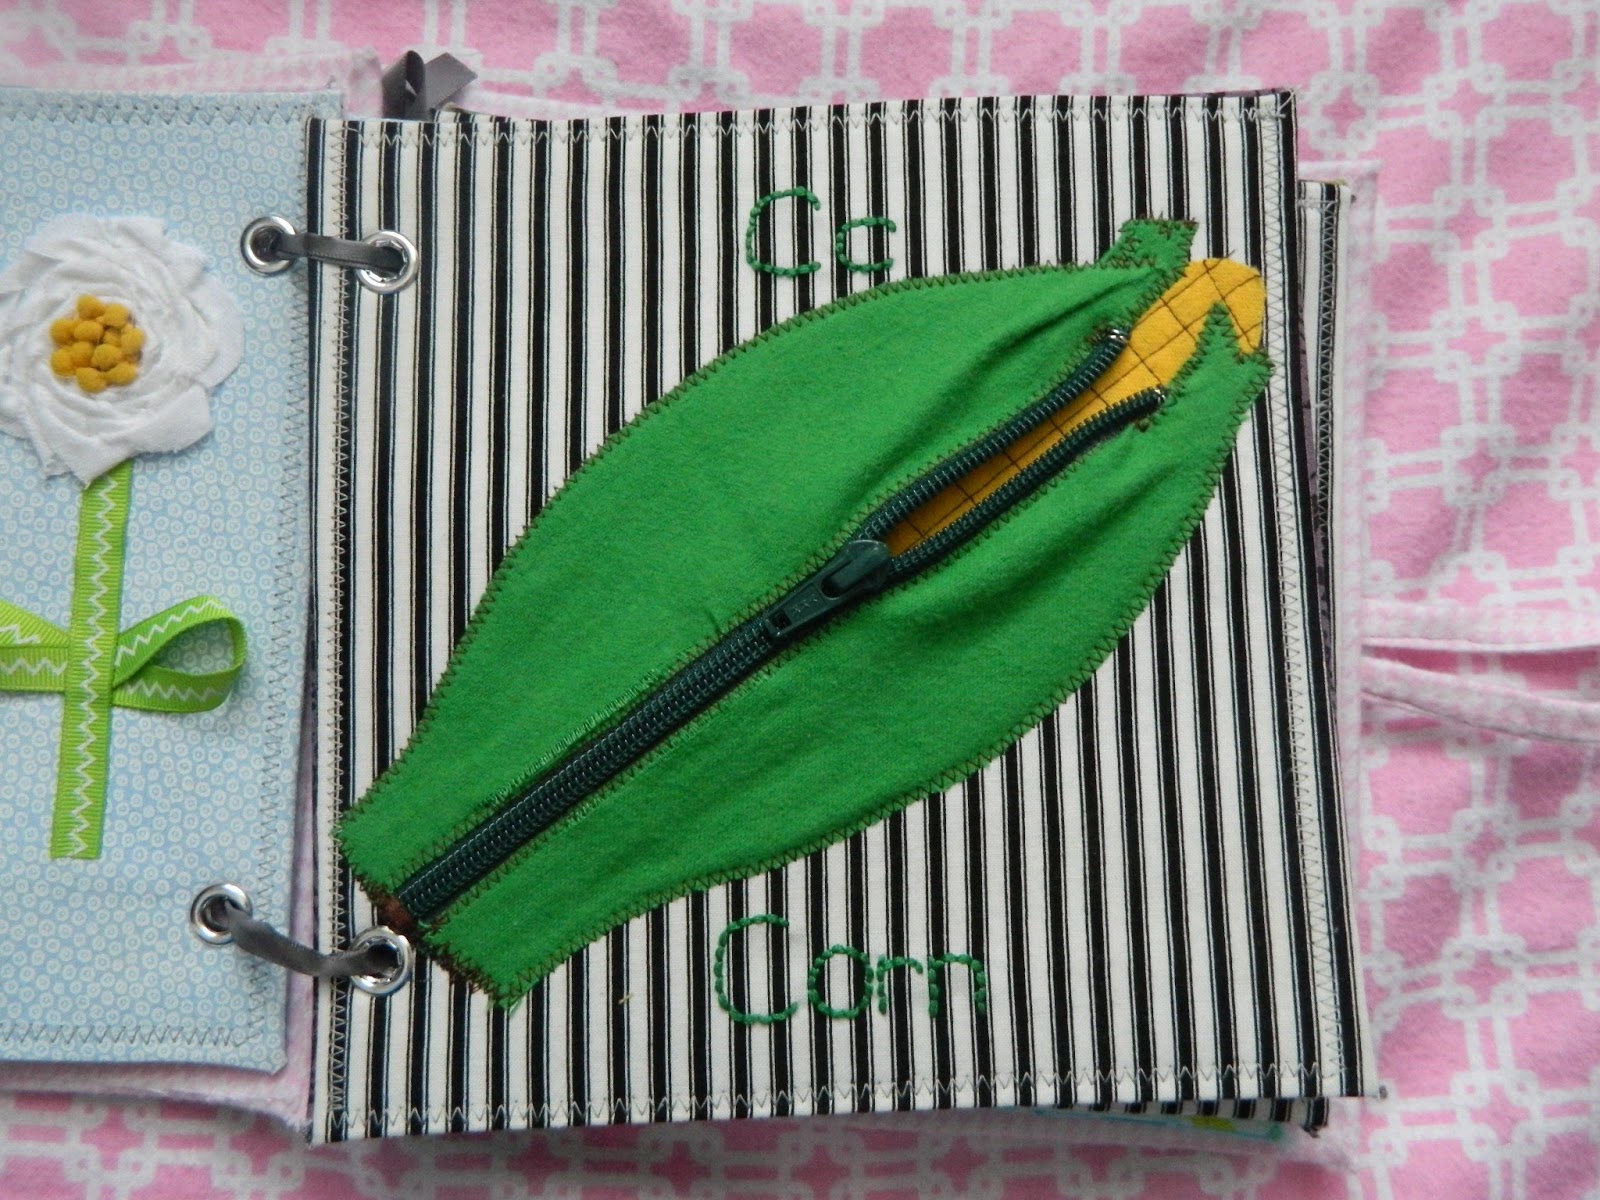
C is for Corn
Unfortunately this page is starting to come apart. My awesome sister-in-law sewed the zipper in for me since I had NO idea how to, but because we used flannel it's already begun fraying and pulling away. I'm still not sure how I'm going to fix this, so if you have any suggestions it would be much appreciated!
For the cob of corn I sewed the yellow to the background in a grid so that it would look like little kernels.
D is for Duck
For the tub I used some Peltex as backing to make it sturdier, since it would be holding the duck and washcloth. The duck and washcloth are both attached to ribbon so they can come out and play. Evelyn sure loves to "wash wash wash" things! The washcloth material was starting to come apart when I cut it so I sewed it to some white flannel to help it keep its shape - so far it's working!
E is for Elephant
Yes, I am aware that the balloons look like they were sewn by a three-year-old. Do you have any idea how hard it is to sew in a circle? I sure didn't until I tried this. I used some more Peltex for the balloons to make them sturdier, since they snap off and on the page. I accidentally sewed one of the snap backings on differently than the others (two female snaps and a male on the balloons) so I colour-coordinated the thread on the page so you know to try and snap the yellow balloon to the yellow snap, the purple with purple and the green with green. For this page I stuck the sequined sticker right to the page instead of having him removable.
F is for Fish
I sewed the seaweed to the page first, then mostly sewed the plastic, poured in a bunch of tiny beads, and sewed it the rest of the way. The plastic was nigh unto impossible to sew because it kept sticking to the foot of my sewing machine. After a call to my Grandma I ended up taping a page of the phone book to the plastic and sewing through the page, which helped glide things along. I practiced first with just taping it, but the tape was almost impossible to pick out of the seam afterwards.
G is for Gumballs
I was going to use pompoms but figured it would push an already chubby book over the edge into obese, so I got a St Patty's Day window decal kit and cut some gumballs out of the rainbow. This way they're removable and she can play with them.
H is for House
Yes, I am aware that this house looks like it's on the San Andreas fault (or the edge of a coulee). In my defense, it looked straight when I sewed it on the page in the first place. This is actually better than it was before, the roof and the grass ribbon trim helped even it out quite a bit. I used some more plastic to make a little window to slide our picture in and out of. This is definitely a contender for Evelyn's favourite page. Actually, it's probably tied for first with this next one.
Peek a Boo!
I is for I Spy
Evelyn's other favourite page. Every time she looks at it she points at the bunny and makes a bunny sound. Which, in case you're wondering, is a tiny little chewing sound. Also, certain turtles make it.
This page was super easy. Lay out iron-ons. Iron on.
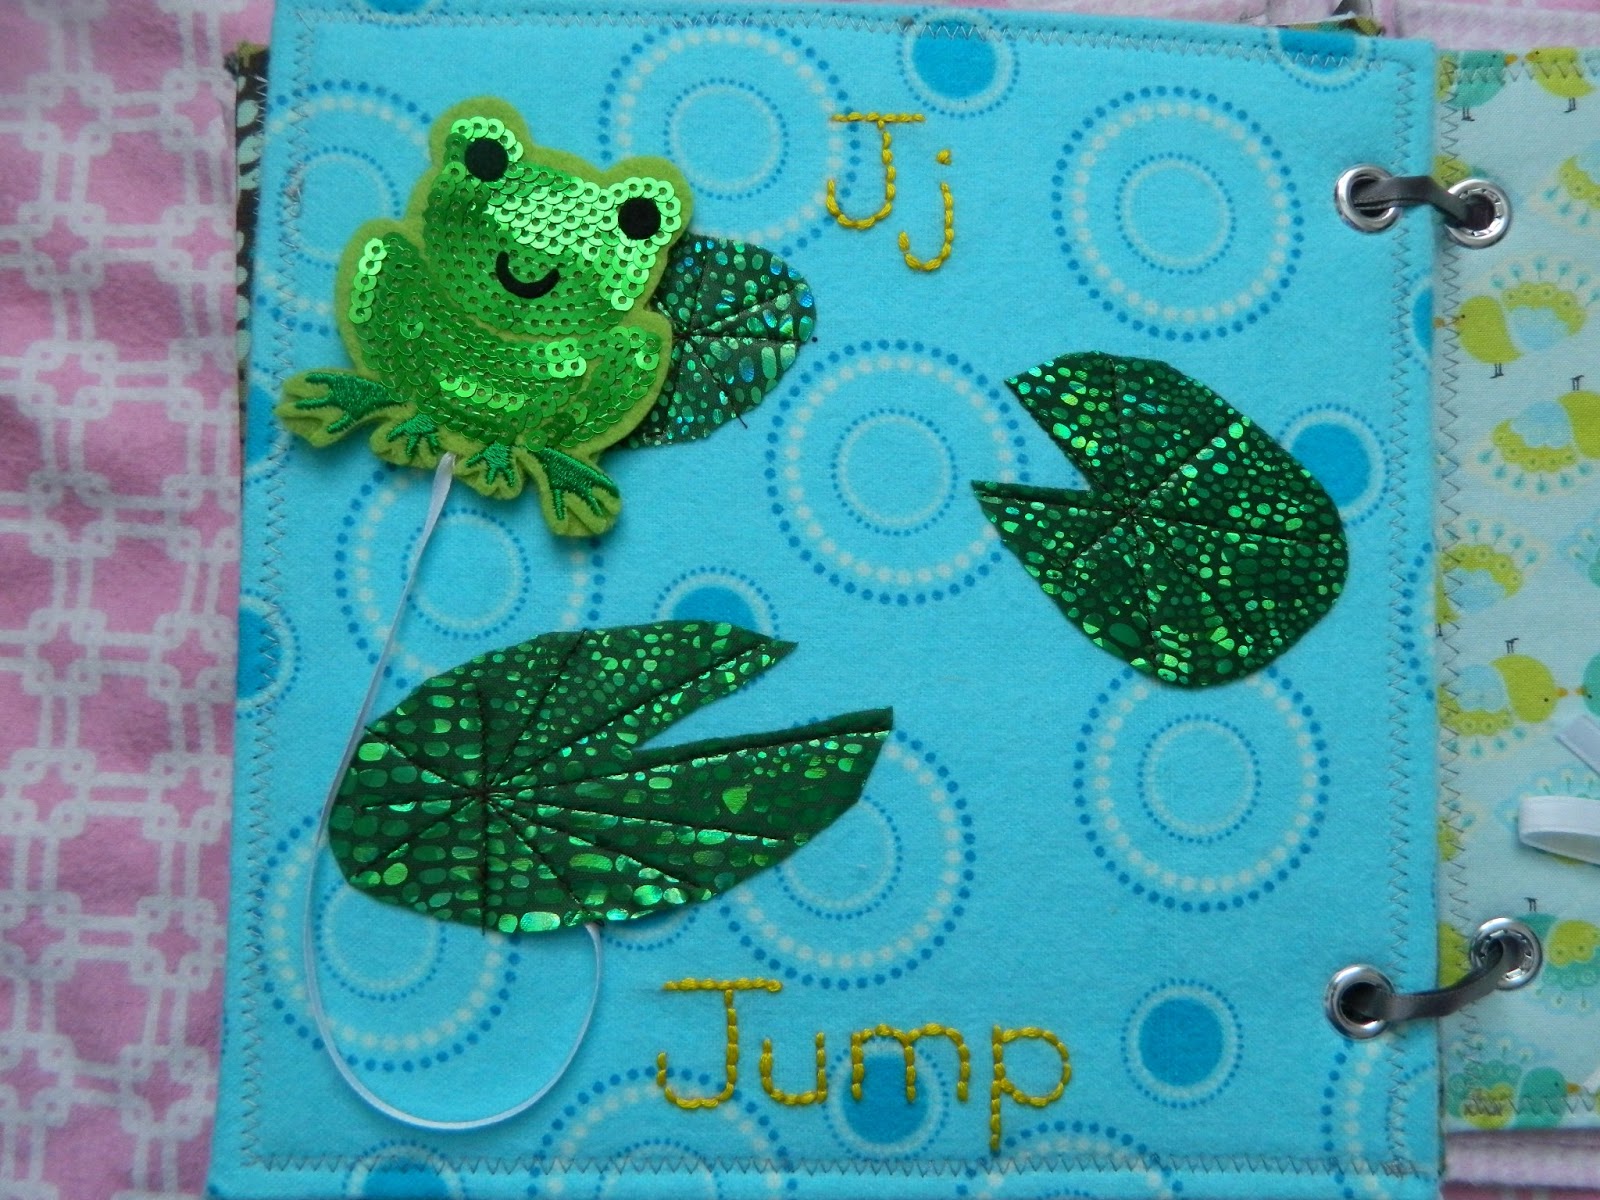
J is for Jump
After the fiasco that was the balloons I didn't want to try my hand at sewing another circle. My husband had the great idea of sewing in a star shape, which actually made the stitching look like the veins of the lily pad. Evelyn is a pro at this page - the second I turn to it she's making the little froggie jump like crazy!
K is for Kite
A nice, simple page. Tie the ribbons.
L is for Lion
Yes, I am aware that the lion's face looks like he got into a fight with Chuck Norris. No, Evelyn doesn't care. Actually it isn't until looking at this picture that I realize how much the ribbons are starting to fray. I should stick some fray glue on those bad boys.
For this one I sewed each layer of ribbons down individually to help give it more structure, since the idea is that she'll be pulling on them. I put a little batting in behind his face to make it squishy. Maybe a little too squishy.
Not bad, eh? I was pretty stinkin' proud of how her name turned out.
Well, there you have it! One bonafide, Mama-made Quiet Book. Voila!
If you have any questions feel free to ask!